It’s been a while since I wrote the RGB LED tutorial on my blog. Not sure if you have done yours.
If you would like to learn the whole project from the scratch, please visit these two tutorial first.
– Tutorial 1
– Tutorial 2


Since this is a night lamp, there is no need to let this lamp too bright. I decided to use 6 RGB LED to be the light source. Please refer to my RGB LED tutorial 1 to see the how to wire up.


HC-05 Bluetooth Module wiring as follow:
- TX connect to Arduino Pin 11(RX)
- RX connect to Arduino Pin 12(TX)
- Remember to connect TX on the HC-05 to RX on the Arduino and RX on the HC-05 to TX on the Arduino, so Arduino can receive data correctly.
- VCC connect to 5V power
- GND connect to Ground


Then, I attached HC-05 Bluetooh module on the the Arduino Mini Pro.
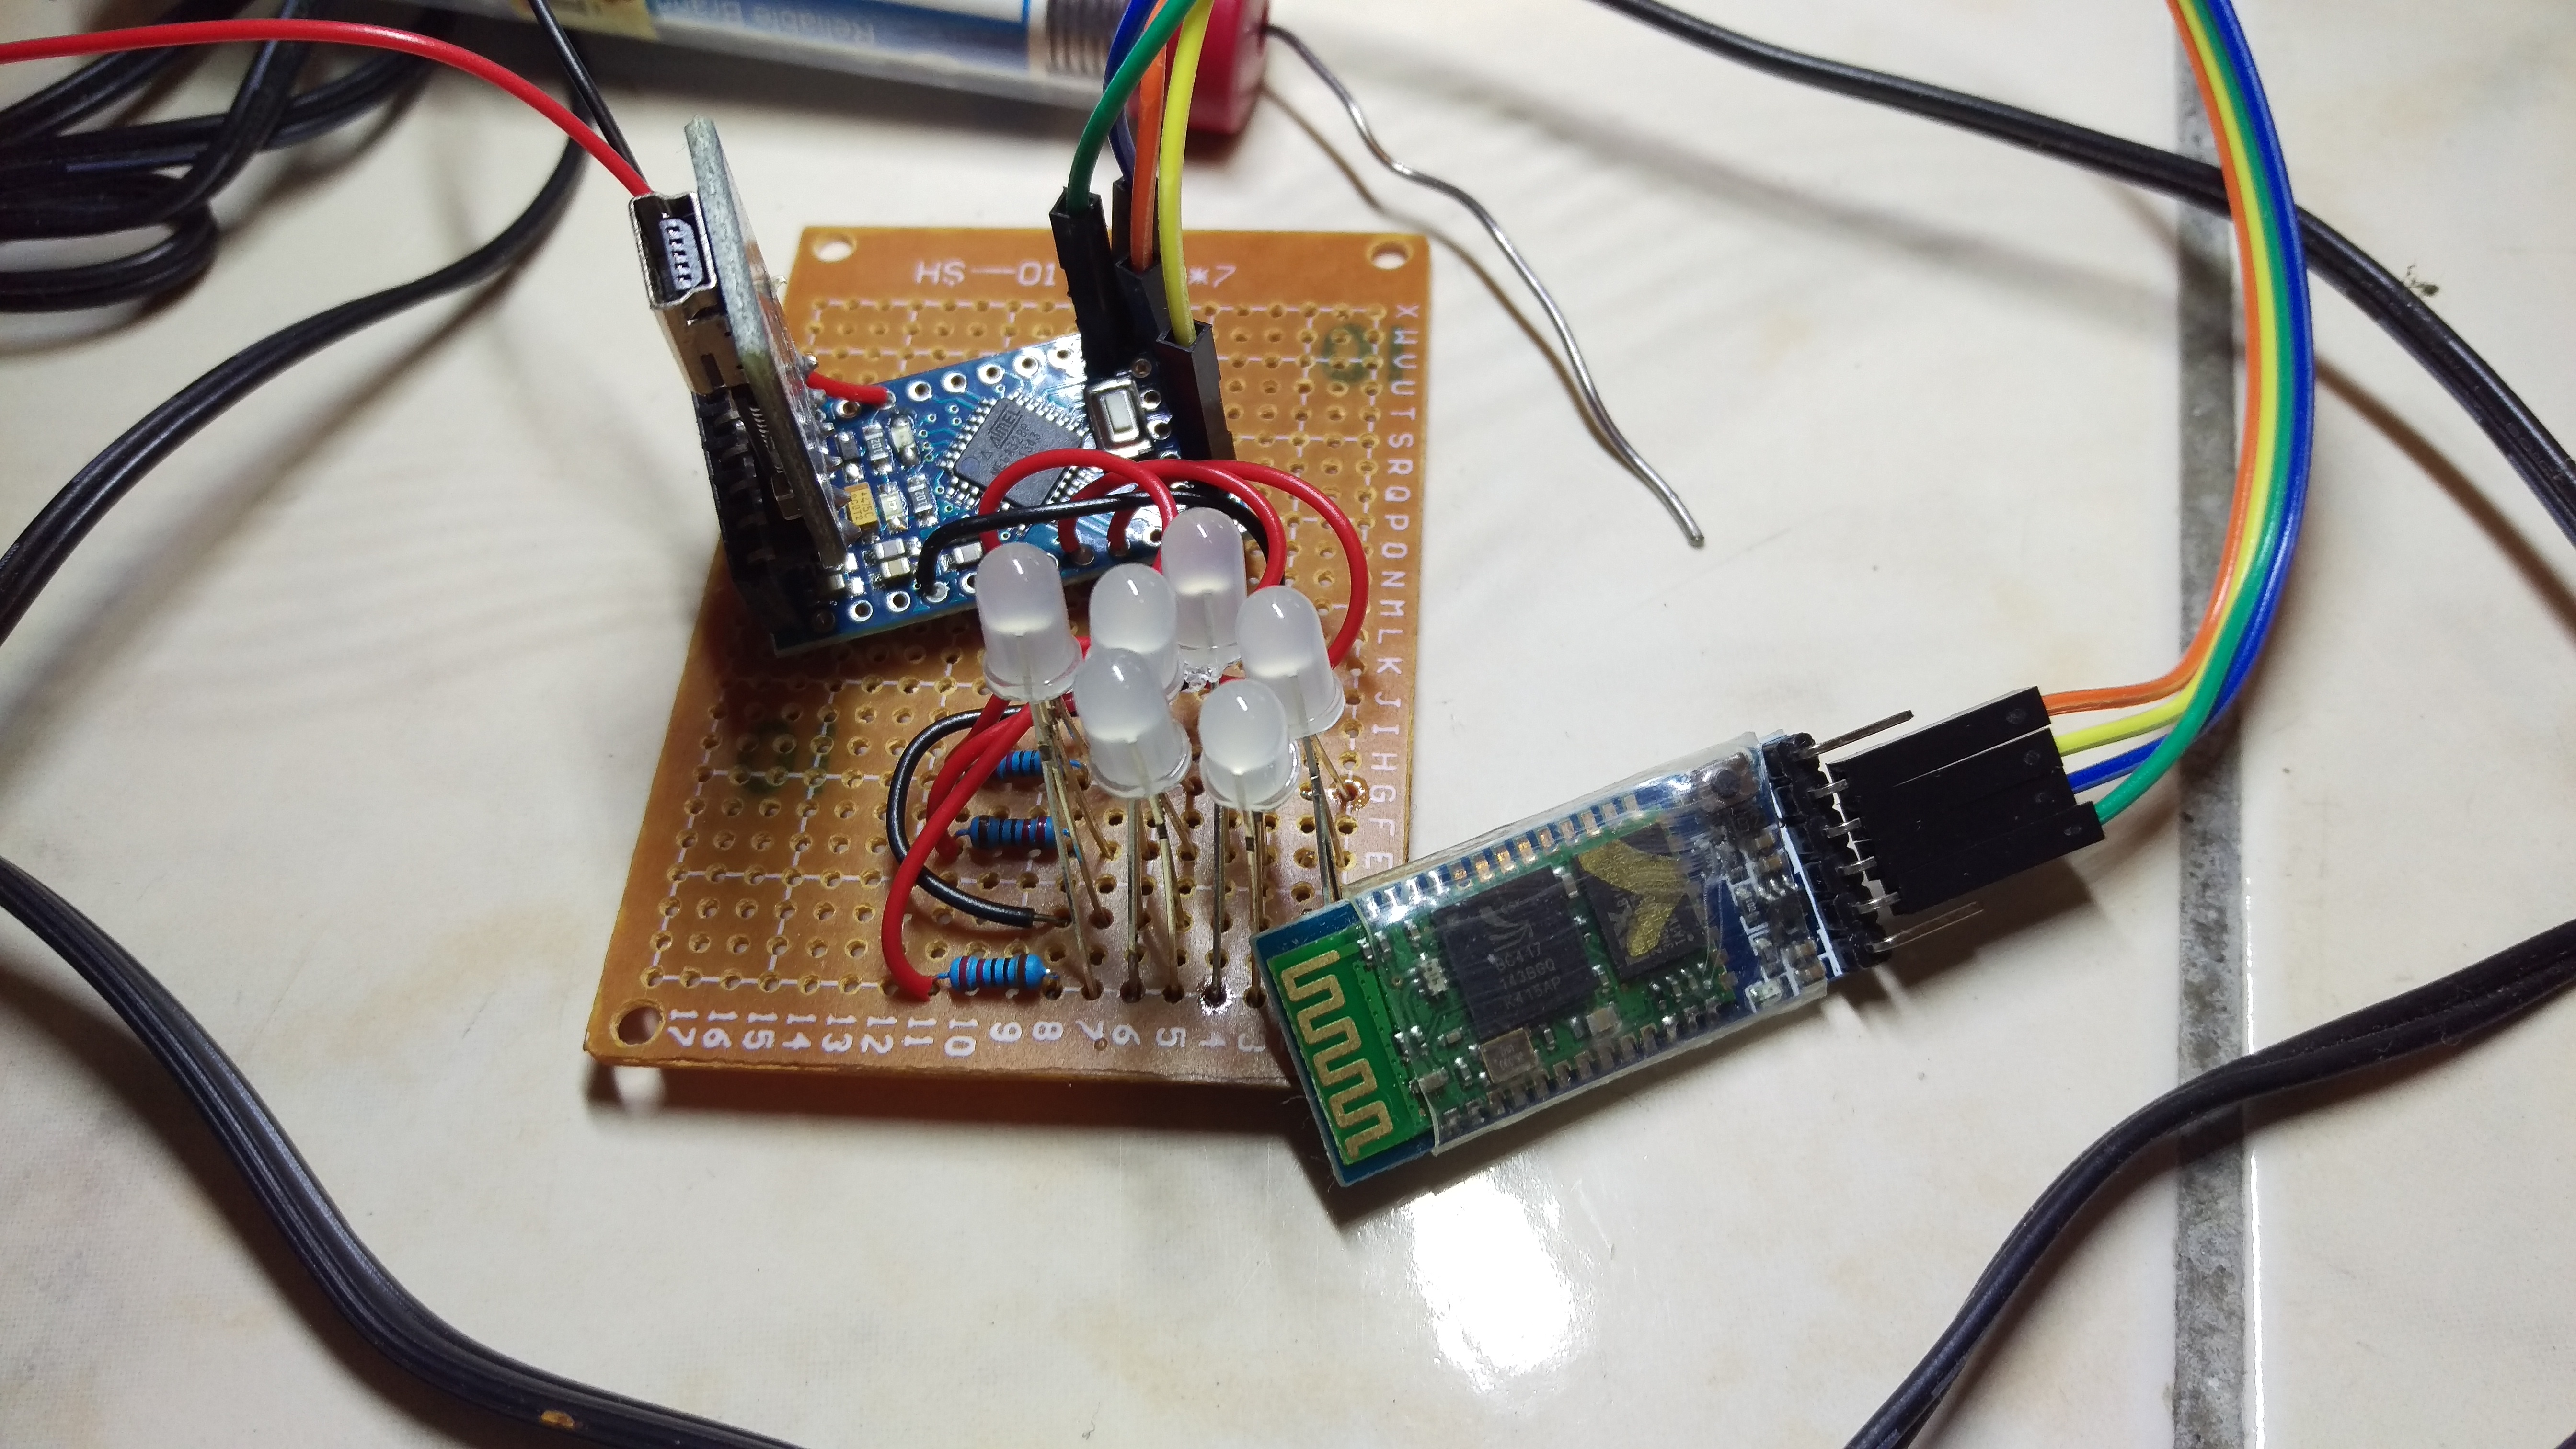
** Remember to test it the whole thing to make sure it’s working before you continue.**
I also cut the porto board in half to save more space below.
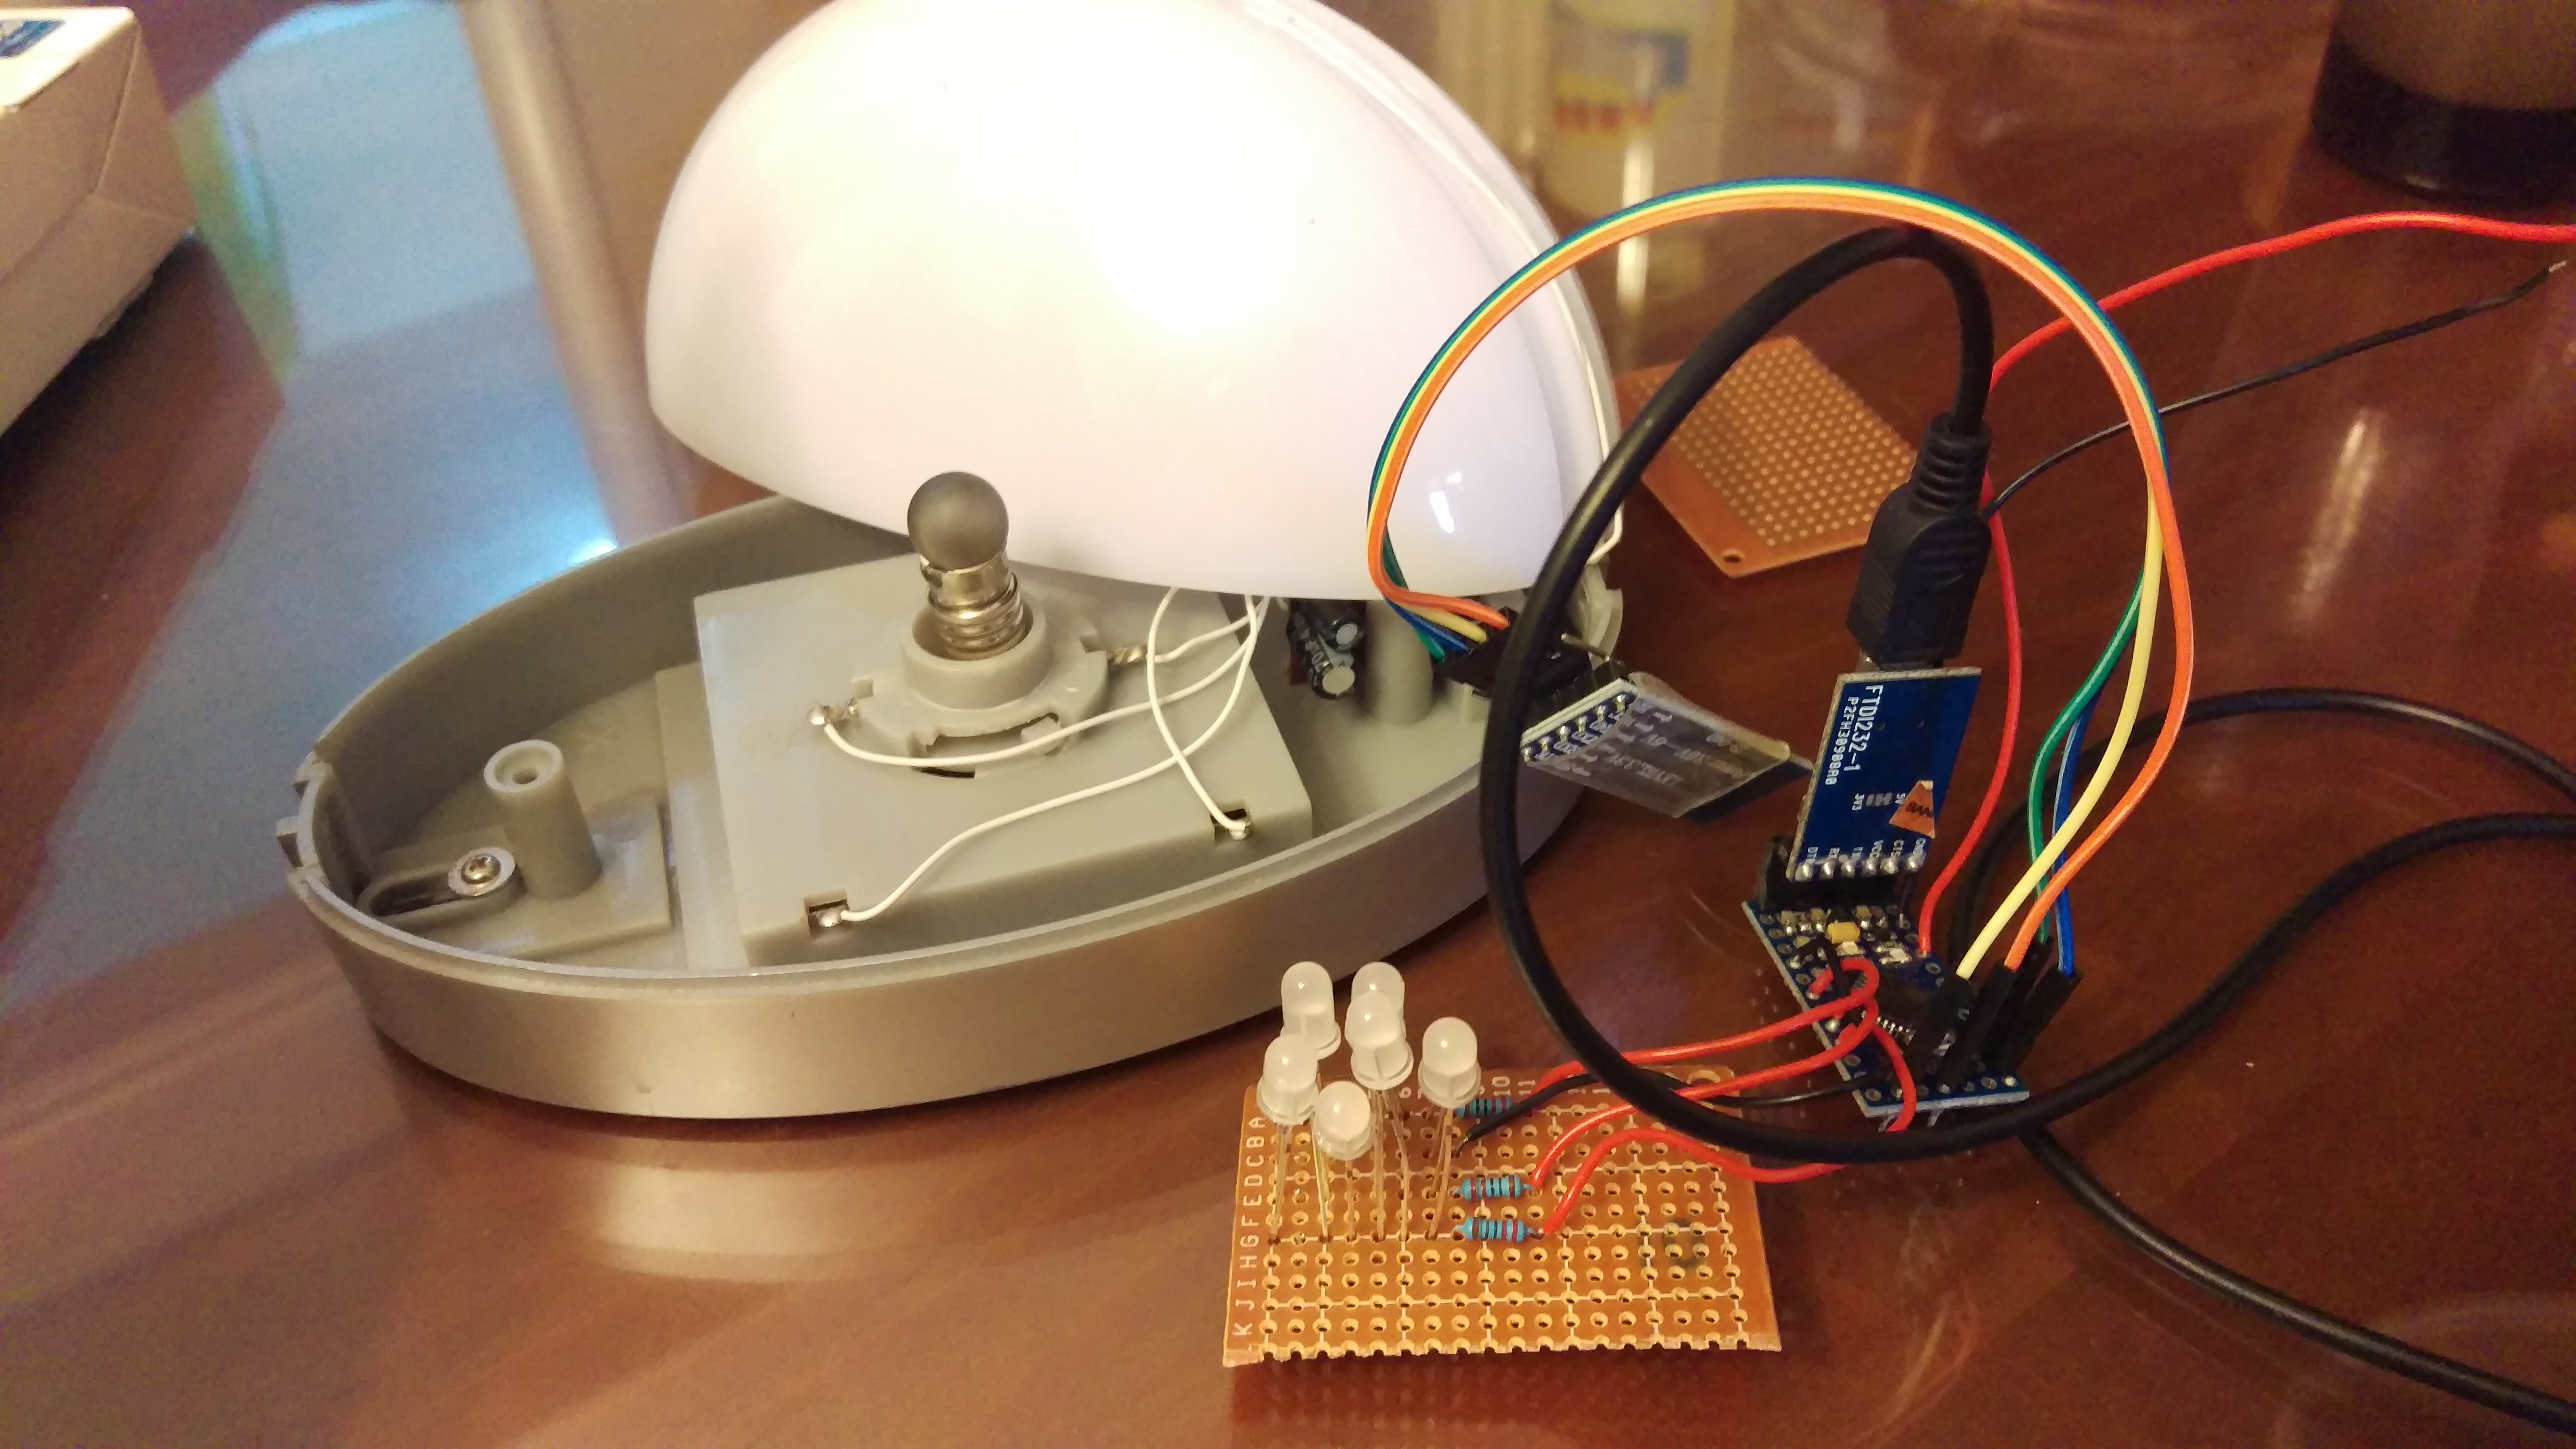
Look at the picture where I circled, I needed to keep the original connector to connect to Arduino Mini Pro, so the power plug can be inserted correctly into the lamp plug.

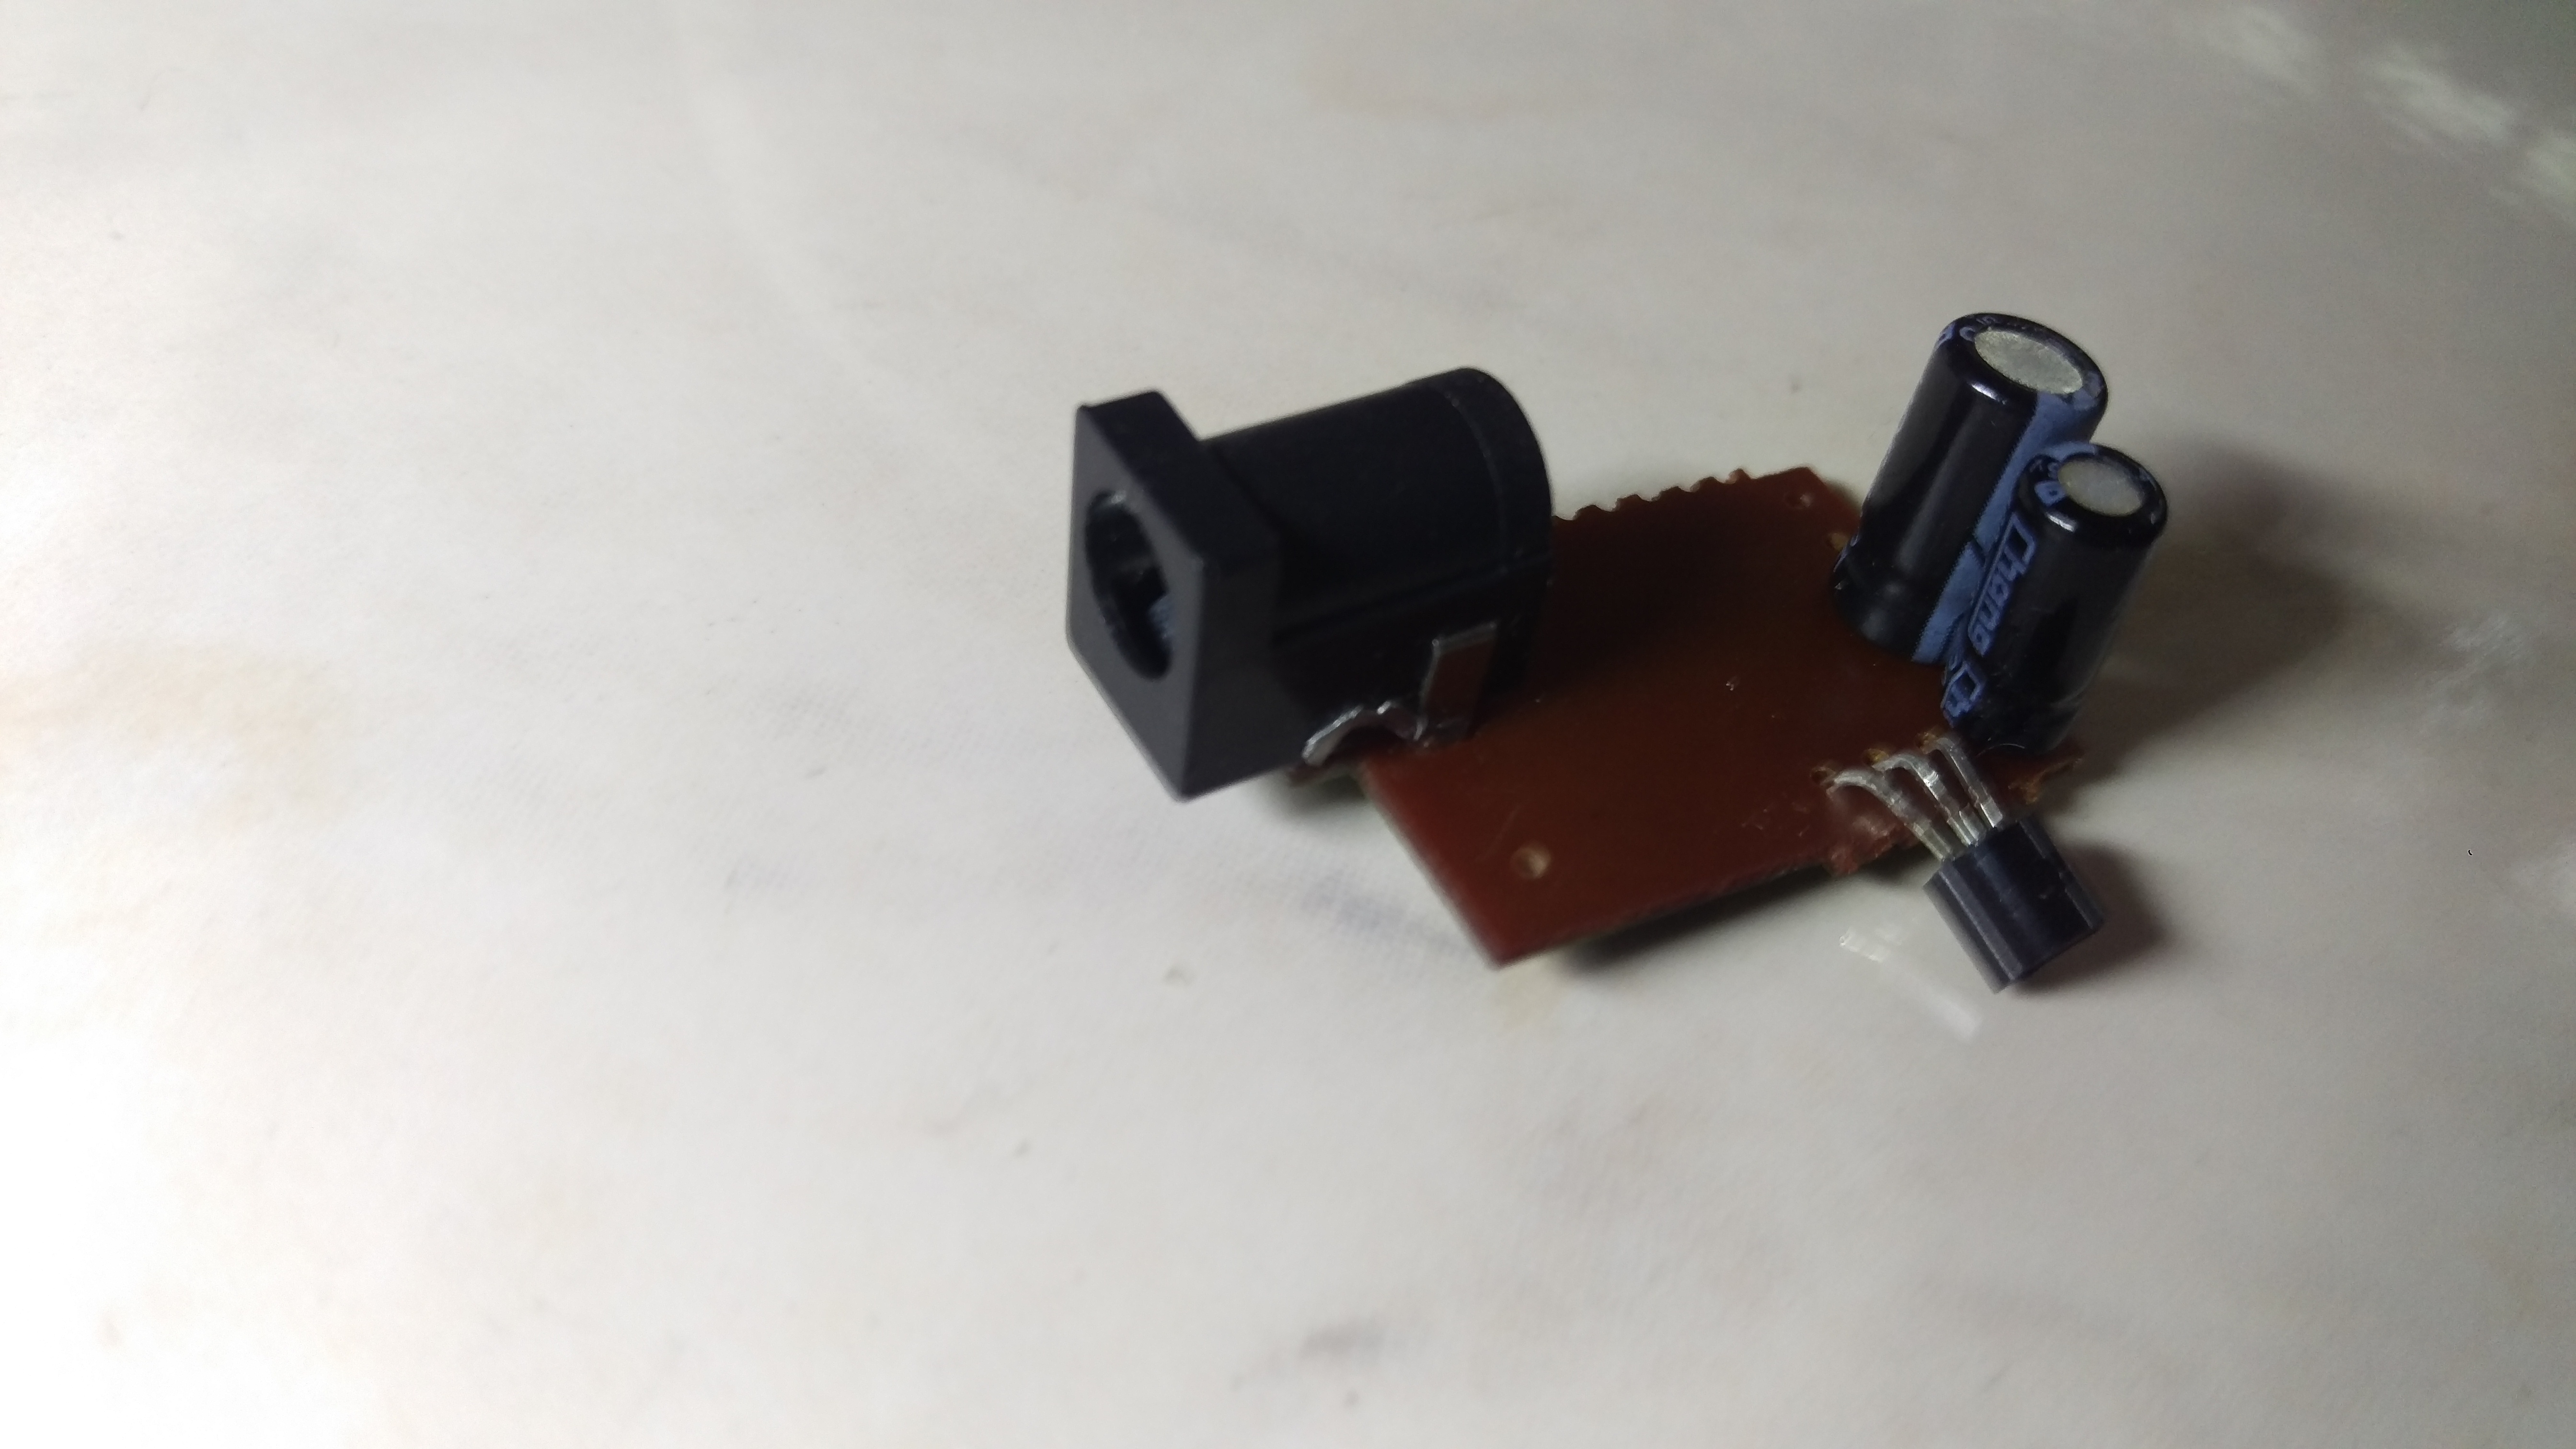
Here is the original PCB module come with the lamp. I just removed the connector with a plier instead of desoldering it. Believe me, I did try to desolder the connector from the PCB and it was really difficult for me, even with a tiny tool that sucked the soldering away from PCB.
There is a battery compartment under this night lamp. So I decided to put HC-05 Bluetooth module into this compartment to save space. By doing this, I had to insert 4 wires to go through the tiny hole in the center that was originally holding the light bulb. Since the thickness of the compartment door is quite thin, I could see the HC-05 Bluetooth LED indicator to see if it’s connected or not! 🙂
** Fast flash: Not connected.
** Flash twice per 2 seconds: Connected.


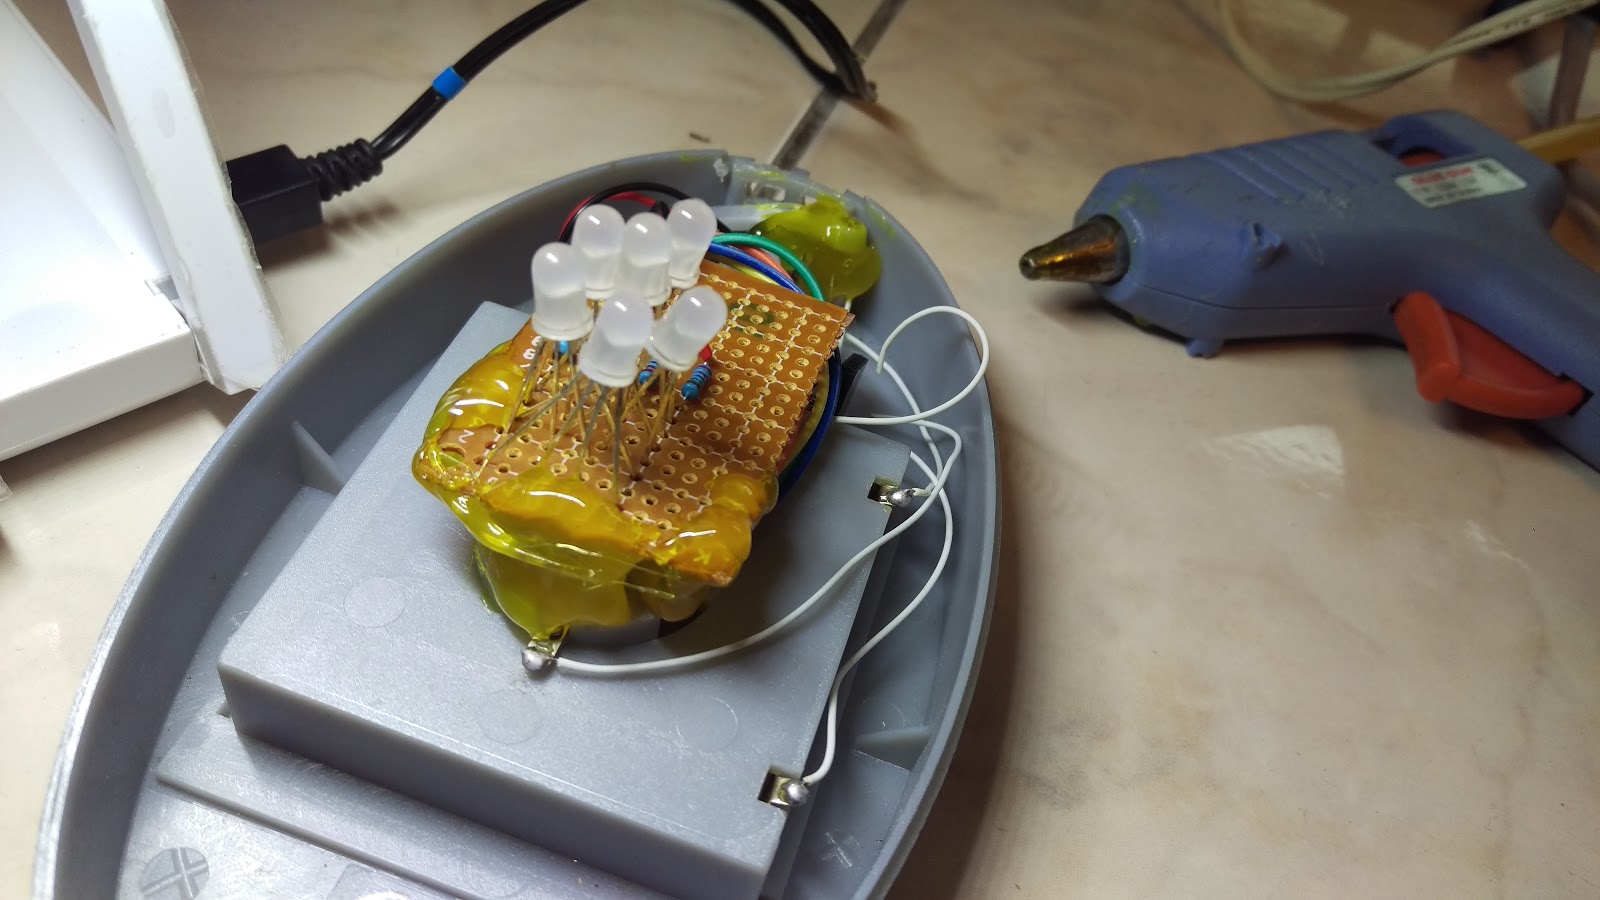
Power it up! Cool, it’s working now! I modified Arduino programming a little bit to set my PCB to light up with Blue color as soon as it powered up.

Now, I set next beside my children’s bed to let him enjoy this magic night lamp and he loved it! 🙂
END
Part III – Android HC-05 藍芽連線控制彩色 RGB LED: DIY 以手機控製夜燈
自從我把製作手機用藍芽搖控 RGB LED 彩色貼到部落格上,也有一段時間了。不知道你是否也依著步驟,DIY了你自己的呢?
如果你想要從頭開始的話呢,你可以先瀏覽前面兩篇來照著做,不會很困難的!
– Arduino + BT + RGB LED 教學 1
– Arduino + BT + RGB LED 教學 2
看來要塞進去這個project全部的零件不是問題。
反正是個小夜燈,用不著太亮,所以我只用了6個RGB LED並聯在一起。
連接方法請參考 RGB LED 教學 1
HC-05 Bluetooth Module wiring as follow:
- TX connect to Arduino Pin 11(RX)
- RX connect to Arduino Pin 12(TX)
- Remember to connect TX on the HC-05 to RX on the Arduino and RX on the HC-05 to TX on the Arduino, so Arduino can receive data correctly.
- VCC connect to 5V power
- GND connect to Ground
接下來,把 HC-05 籃芽模組也一起焊上。
** 別忘了先試試整個電路板都運作正常 **
洞洞板還蠻大一片的,所以把它剪一半掉以節省空間。
底下圈起來的是原先小夜燈用的連結座,我要把這個連結座拆下來,這樣搭配 5V/500mA的變壓器使用剛剛好。
這個是小夜燈上面拆下來的PCB,其實我要的只是那個連結器,其它用不到了。我試過用空空吸錫的小工具把連結器解銲下來。天啊,還真的不容易啦…那位高手再教一下吧!
小夜燈底下有個裝電池的空間(如下圖)。我把藍芽模組 HC-05 經由裝燈泡的洞穿過去,這樣可以節省一些空間。電池座的塑膠門剛好又非常的薄,所以可以這裡看到 HC-05 藍芽連接的燈號。
** 快速閃爍: Not connected.
** 每兩秒閃二之: Connected.
插上電源試試! 把前面的教學程式稍作修改,該每次接上電源後,讓它點亮藍色的。
現在,我把這個小夜燈放在小孩的房間裡,讓他使用這個可以隨時心情改變顏色!
完!